Thread

Threadはスレッドを扱うクラス・・・。

Thread クラス (System.Threading)

別スレッドを生成して、重たい処理などを任せるときに使う・・・。
といっても、現在は非同期処理が充実してるのでこれを使うことはほとんど無いだろう・・・。
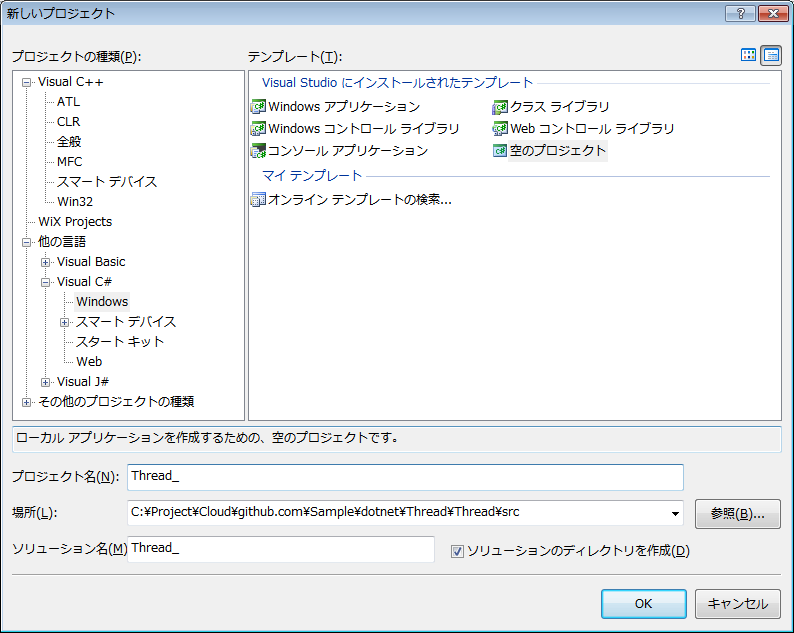
f:id:BG1:20170324131113p:plain

空で、

f:id:BG1:20170324131129p:plain

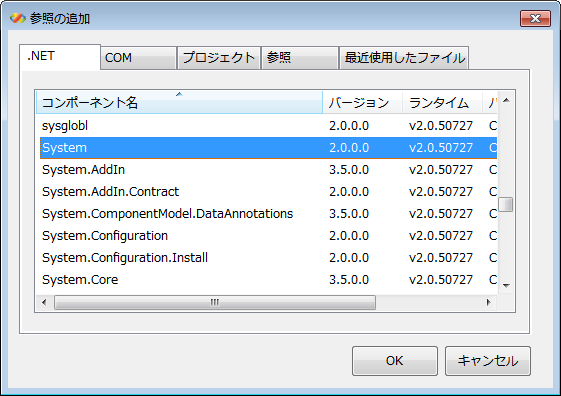
Systemを追加・・・。

MainClass.csで、

Threadオブジェクトthreadを生成・・・。
コンストラクタに生成したThreadStartオブジェクトを渡す・・・。
実はこれ、ThreadStartデリゲート・・・。
つまり、これのコンストラクタに、さらに今回スレッドに実行させるメソッドThreadFuncを渡すと、デリゲートとしてThreadに渡る・・・。
でこれをThreadが別スレッドで実行する・・・。

ThreadFuncは、

"ThreadFunc(1)"~"ThreadFunc(5)"まで出力・・・。

thread.Startでスレッド開始・・・。

Main側では、"Main(1)~Main(5)"まで出力・・・。

実行すると、

Main(1)
ThreadFunc(1)
ThreadFunc(2)
ThreadFunc(3)
ThreadFunc(4)
ThreadFunc(5)
Main(2)
Main(3)
Main(4)
Main(5)
続行するには何かキーを押してください . . .

1回目は、Main(1)とMain(2)の間にThreadFunc(1)~ThreadFunc(5)が割り込んでて、同時に実行してる感じに見える・・・。

2回目は、

ThreadFunc(1)
ThreadFunc(2)
ThreadFunc(3)
ThreadFunc(4)
ThreadFunc(5)
Main(1)
Main(2)
Main(3)
Main(4)
Main(5)
続行するには何かキーを押してください . . .

ThreadFuncが全部実行されてから、Mainが実行されてるように見えて、同時に実行してる感じには見えない・・・。

Sample/dotnet/Thread/Thread/src/Thread_ at master · bg1bgst333/Sample · GitHub

Process

Processは、プロセスを扱うクラス・・・。

Process クラス (System.Diagnostics)

Process.Startで指定のアプリケーションを実行する・・・。

f:id:BG1:20170322190349p:plain

空で、

f:id:BG1:20170322190401p:plain

MainClass.csを追加したら、

f:id:BG1:20170322190424p:plain

Systemを追加・・・。

Systemに加えて、System.Diagnosticsのusingを追加・・・。
Process.Startで電卓(calc.exe)を起動・・・。
環境変数Pathにあれば、相対パスでいける・・・。

f:id:BG1:20170322190631p:plain

いけた・・・。

Sample/dotnet/Process/Process/src/Process_ at master · bg1bgst333/Sample · GitHub

ServiceBase

ServiceBaseは、サービスプログラムの基底となるクラス・・・。

ServiceBase クラス (System.ServiceProcess)

簡単なサービスを作成する・・・。

f:id:BG1:20170322173200p:plain

空のプロジェクトで、

f:id:BG1:20170322173254p:plain

MainClass.csを追加・・・。

f:id:BG1:20170322173331p:plain

参照でSystem.ServiceProcessを追加・・・。

f:id:BG1:20170322173421p:plain

イベントログを出力するので、Systemも追加・・・。

MainClassはServiceBaseを基底クラスとする・・・。
Mainメソッドでは、スタティックなServiceBase.RunメソッドにMainClassインスタンスをnewで生成して渡す・・・。
その前後にイベントログを出力・・・。

サービス開始時OnStartでもイベントログ出力・・・。

サービス停止時OnStopでもイベントログ出力・・・。

f:id:BG1:20170322174241p:plain

コマンドプロンプトを管理者権限で起動・・・。

C:\Project\Cloud\github.com\Sample\dotnet\ServiceBase\ServiceBase\src\ServiceBas
e_\ServiceBase_\bin\Debug>sc create ServiceBase_ binPath= C:\Project\Cloud\githu
b.com\Sample\dotnet\ServiceBase\ServiceBase\src\ServiceBase_\ServiceBase_\bin\De
bug\ServiceBase_.exe
[SC] CreateService SUCCESS

sc createコマンドでServiceBase_サービスを追加・・・。

管理ツールのサービスを見ると、

f:id:BG1:20170322174635p:plain

追加されてる・・・。
開始を押すと、

f:id:BG1:20170322174709p:plain

となり、イベントログで、

f:id:BG1:20170322174753p:plain

Run before

f:id:BG1:20170322174823p:plain

OnStart

f:id:BG1:20170322174855p:plain

これは基底クラスServiceBaseにある開始時にイベントログを出力するかのオプションがtrueになっているからかも・・・。

f:id:BG1:20170322175011p:plain

今度は停止してみる・・・。

f:id:BG1:20170322175039p:plain

止まったので、

f:id:BG1:20170322175103p:plain

OnStop

f:id:BG1:20170322175139p:plain

ServiceBaseのやつ・・・。

f:id:BG1:20170322175210p:plain

Run after

C:\Project\Cloud\github.com\Sample\dotnet\ServiceBase\ServiceBase\src\ServiceBas
e_\ServiceBase_\bin\Debug>sc delete ServiceBase_
[SC] DeleteService SUCCESS

とすると、

f:id:BG1:20170322175326p:plain

削除されてる・・・。

Sample/dotnet/ServiceBase/ServiceBase/src/ServiceBase_ at master · bg1bgst333/Sample · GitHub

IpcServerChannel

IpcServerChannelは、IPCというプロセス間通信のサーバチャンネルを開くためのクラス・・・。

IpcServerChannel クラス (System.Runtime.Remoting.Channels.Ipc)

IPCサーバとIPCクライアント間でIPCプロセス間通信をしてみる・・・。

f:id:BG1:20170322133637p:plain

今回はWindowsアプリケーションでまずサーバを作る・・・。

f:id:BG1:20170322133735p:plain

参照を追加・・・。

f:id:BG1:20170322133756p:plain

System.Runtime.Remotingが必要・・・。

IpcServerChannel_プロジェクトのForm1.csは、

System.Runtime.Remoting以下をusing・・・。
IpcServerChannelオブジェクトserverをChannelServices.RegisterChannelで登録・・・。
後述するRemoteObjectのremoteObjをRemotingServices.Marshalで公開する流れ・・・。
今回は、server生成時にポート名"ipcserver"、公開時にURI"message"と指定しているので"ipc://ipcserver/message"というURIで公開される・・・。

f:id:BG1:20170322134554p:plain

新しいプロジェクトを追加・・・。

f:id:BG1:20170322134617p:plain

今度はIpcClientChannel_・・・。
こちらにもSystem.Runtime.Remotingの参照を追加しておく・・・。
そして、

clientをChannelServices.RegisterChannelに登録・・・。

f:id:BG1:20170322134938p:plain

サーバもクライアントもテキストボックスとボタンを配置・・・。

f:id:BG1:20170322135034p:plain

IpcClientChannel_では、タイトルをClientに・・・。
IpcServerChannel_では、タイトルをServerに・・・。

あとは、ボタンのハンドラ・・・。

サーバはボタンを押したら、remoteObj.MessageにtextBox1.Textの内容を渡す・・・。

クライアントはActivator.GetObjectに"ipc://ipcserver/message"を指定してremoteObjを取る・・・。
取ったremoteObj.MessageをtextBox1.Textに・・・。

でこのRemoteObjectは、

と、

両方のプロジェクトで定義・・・。
名前空間も共通化して見えるように・・・。

f:id:BG1:20170322135805p:plain

Serverで"ABCDE"と入力して、button1を押す・・・。
Client側は空の状態でbutton1を押すと、

f:id:BG1:20170322135822p:plain

反映される・・・。

f:id:BG1:20170322135848p:plain

Serverで文字列を変えて、button1を押し、
Client側でbutton1を押すと、

f:id:BG1:20170322135923p:plain

また反映される・・・。

Sample/dotnet/IpcServerChannel/IpcServerChannel/src/IpcServerChannel_ at master · bg1bgst333/Sample · GitHub

EventLog

EventLogは、イベントログを出力するクラス・・・。

EventLog クラス (System.Diagnostics)

イベントログを出力してみる・・・。

空のプロジェクトで、

f:id:BG1:20170321180819p:plain

Systemを参照し、MainClass.csは、

これだけ・・・。
"EventLog_"がイベントソースで、ログが"Log Message!"・・・。
で、何故try-catchで囲むかというと、このまま実行すると、

System.Security.SecurityException: ソースが見つかりませんでしたが、いくつかまた
はすべてのログを検索できませんでした。アクセス不可能なログ: Security
   場所 System.Diagnostics.EventLog.FindSourceRegistration(String source, String
 machineName, Boolean readOnly)
   場所 System.Diagnostics.EventLog.SourceExists(String source, String machineNa
me)
   場所 System.Diagnostics.EventLog.VerifyAndCreateSource(String sourceName, Str
ing currentMachineName)
   場所 System.Diagnostics.EventLog.WriteEntry(String message, EventLogEntryType
 type, Int32 eventID, Int16 category, Byte[] rawData)
   場所 System.Diagnostics.EventLog.WriteEntry(String source, String message, Ev
entLogEntryType type, Int32 eventID, Int16 category, Byte[] rawData)
   場所 System.Diagnostics.EventLog.WriteEntry(String source, String message)
   場所 MainClass.Main() 場所 C:\Project\Cloud\github.com\Sample\dotnet\EventLog
\EventLog\src\EventLog_\EventLog_\MainClass.cs:行 18
失敗したアセンブリのゾーン:
MyComputer
続行するには何かキーを押してください . . .

実は管理者権限で実行すれば成功する・・・。
で、それでもいいが、どうせなので、exeにマニフェストファイルを付けて、管理者権限昇格できるようにしてみた・・・。
しかし、これが結構大変だった・・・。
Visual C# 2005には、マニフェストファイルの追加項目がないので、

そこで、

"C:\Program Files (x86)\Microsoft Visual Studio 8\VC\bin\mt.exe" -manifest "$(ProjectDir)$(TargetFileName).manifest" -outputresource:"$(TargetPath)";1 

これを、

f:id:BG1:20170321181425p:plain

[プロパティ]の[ビルドイベント]の[ビルド後に実行するコマンドライン]にセット・・・。

マニフェストファイルは、WindowsAPIのDispatchMessageからプロジェクトフォルダにもってきたが、ファイル名をEventLog_.exe.manifestにした上で、

level="requireAdministrator"にしないとダメ・・・。

さらに、

f:id:BG1:20170321181805p:plain

ビルド構成がAnyCPUだと、管理者権限アイコンがつかないので、x86に変更・・・。

ここまでしてビルドすると、

f:id:BG1:20170321181946p:plain

管理者権限アイコンがつく・・・。
しかし、VisualStudioが一般権限なので、

f:id:BG1:20170321182038p:plain

管理者で実行・・・。

これでデバッグなしで実行すると、

続行するには何かキーを押してください . . .

例外が出なくなり、

f:id:BG1:20170321182201p:plain

イベントログが出るようになる・・・。

Sample/dotnet/EventLog/EventLog/src/EventLog_ at master · bg1bgst333/Sample · GitHub

NetworkInterface

NetworkInterfaceは、ネットワークインターフェイスに関する情報を持つクラス・・・。

NetworkInterface クラス (System.Net.NetworkInformation)

ネットワークインターフェイスの名前一覧を出力する・・・。

f:id:BG1:20170321153432p:plain

空の場合は、

f:id:BG1:20170321153453p:plain

Systemを参照し、

usingではSystem.Net.NetworkInformationを指定する・・・。
(クラス名はNetworkInterface、参照はSystem、ややこしい・・・。)
NetworkInterface.GetAllNetworkInterfacesでNetworkInterfaceの配列を取得し、niに格納・・・。
niの中からforeachでインターフェイスnを取り出し、n.Nameを出力・・・。これを繰り返す・・・。

n.Name = ローカル エリア接続
n.Name = Loopback Pseudo-Interface 1
n.Name = isatap.{xxxxxxxx-xxxx-xxxx-xxxx-xxxxxxxxxxxx}
続行するには何かキーを押してください . . .

伏せてるけど、こんな感じで3つ出た・・・。

Sample/dotnet/NetworkInterface/NetworkInterface/src/NetworkInterface_ at master · bg1bgst333/Sample · GitHub

RasEntryDlg

RasEntryDlgは、VPNダイアルアップ接続エントリーの作成・編集ダイアログを表示する・・・。

RasEntryDlg 関数

今回は、VPN接続のためにRasEntryDlgで電話帳エントリーの作成を行う・・・。

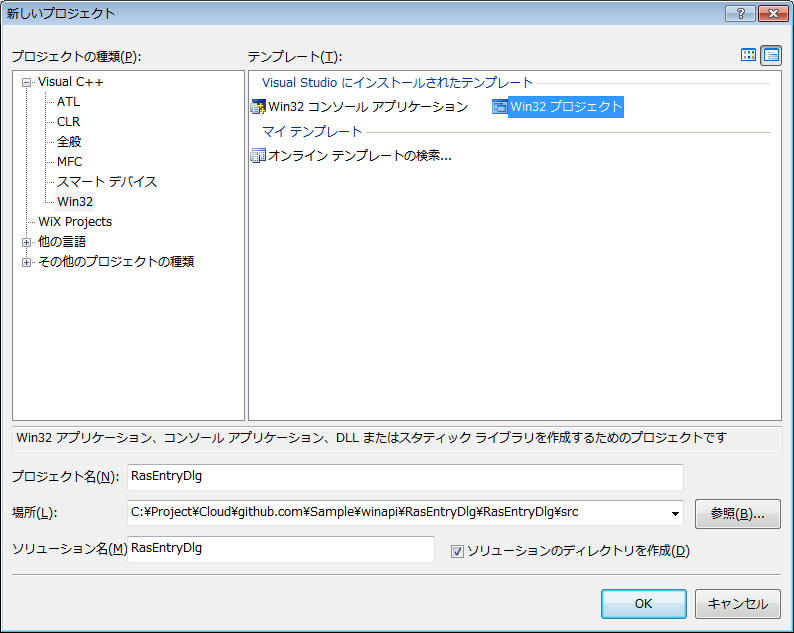
f:id:BG1:20170320120851p:plain

今回はWin32プロジェクト・・・。

f:id:BG1:20170320120941p:plain

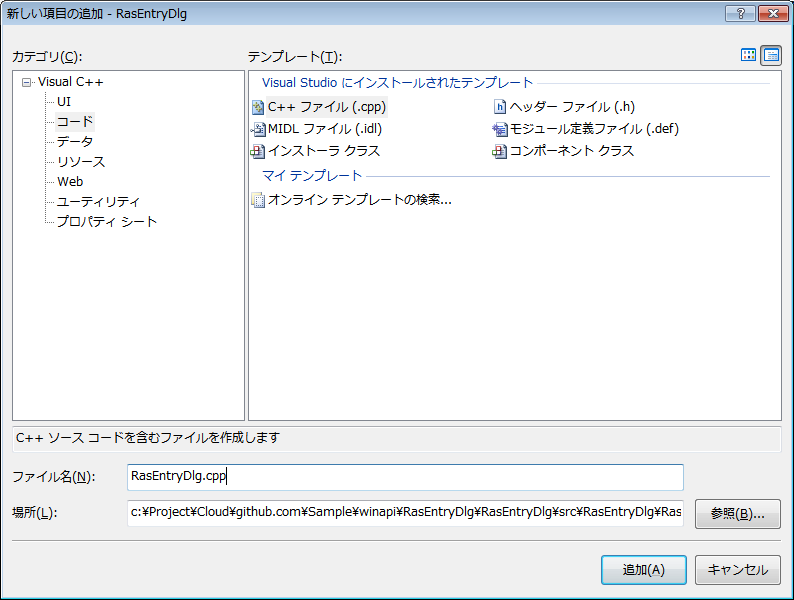
RasEntryDlg.cppを追加したら、

f:id:BG1:20170320121059p:plain

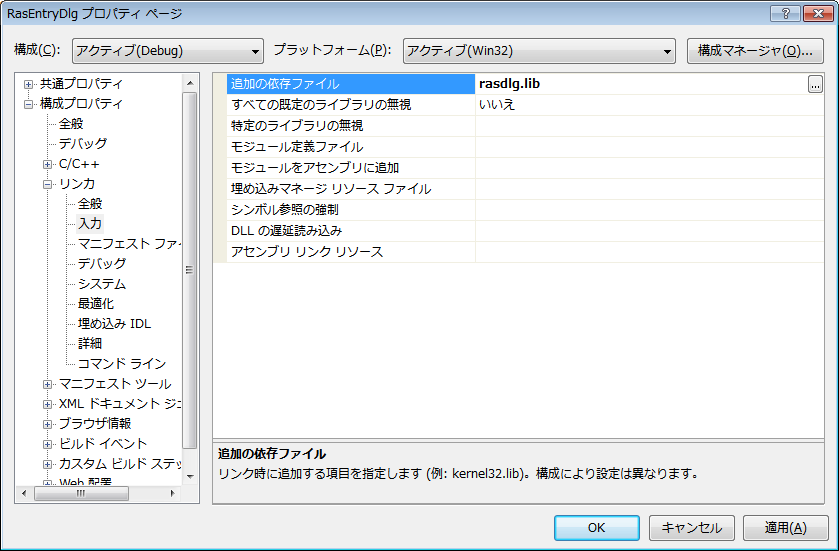
rasdlg.libをリンク・・・。

RASENTRYDLG型rasDlgを0で初期化しておいて、rasDlg.dwSizeにサイズ、rasDlg.dwFlagsにRASEDFLAG_NewEntry(新しいエントリーの追加)を指定する・・・。
あとは、RasEntryDlgにエントリー名とrasDlgを渡すだけで表示される・・・。
最終的に作成されればTRUEでこの時はメッセージを出す・・・。
エラーやキャンセルならFALSE・・・。

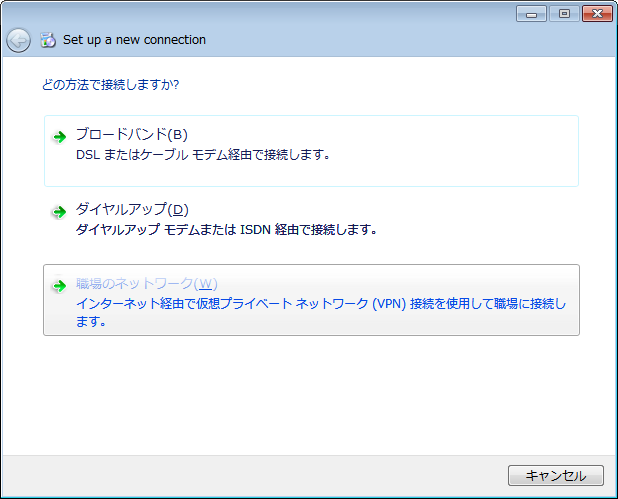
f:id:BG1:20170320121844p:plain

実行すると、これが出てくる・・・。
VPNで、

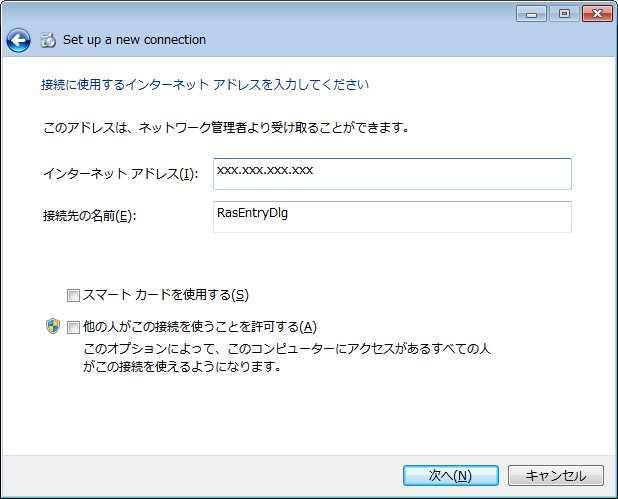
f:id:BG1:20170320121929p:plain

xで伏せてるけど、ここにサーバアドレス(URLでもIPでも)と接続名を入れる・・・。

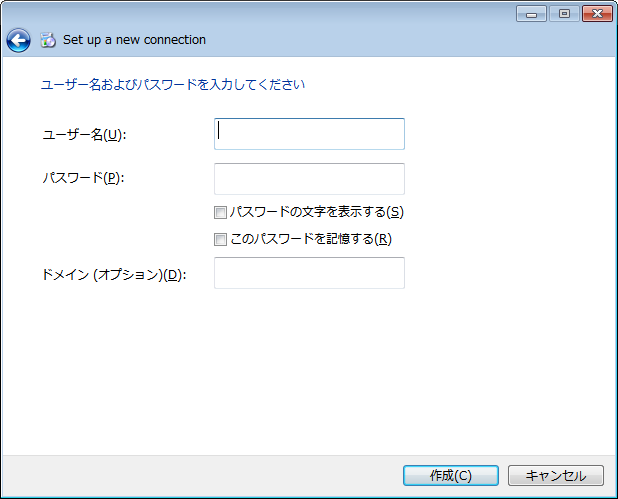
f:id:BG1:20170320122032p:plain

ユーザ名、パスワードなどを入れる・・・。

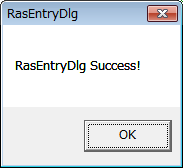
f:id:BG1:20170320122121p:plain

作成成功すると、こっちで用意したメッセージボックスが出る・・・。

f:id:BG1:20170320122227p:plain

そしてエントリーが作成されてる・・・。

Sample/winapi/RasEntryDlg/RasEntryDlg/src/RasEntryDlg at master · bg1bgst333/Sample · GitHub